Knighted


IMG_1535.jpg
She wasn’t waiting for a Knight
She was waiting for a Sword
— Atticus

Welcome to my Kingdom! Today I would like to share Knighted, a canvas I have created for the blog at Mixed Up Mag featuring Sin City Stamps!  

When I begin an art project, I usually have a theme or subject in mind, and though colors and assemblage choices may change throughout the process, the end result still retains most of my original plans.

Not so with Knighted!  

When I began this canvas, my intent was to create a whimsical 'Day of the Dead' piece. I had in fact already made my colorfully embellished sugar skull that was supposed to be the focal point.  Then my background happened, and it was magical!  I didn't want to cover the mystical kingdom that seemed to glow from the canvas. 

Two weeks passed.  I had set the canvas aside with no idea how to finish it.  I pondered.  How's that for a 'knightly' word?  But pondered I did. By chance I came across this poetic phrase by Atticus, 'She wasn't waiting for a knight...She was waiting for a Sword', and I knew I needed to create an empowered female subject, a Knight, for my canvas.

I am excited to invite you to the blog at Mixed Up Magazine so I can share my process of creating Knighted with Sin City Stamps. Follow the link above to see more photos, steps and a list of products I used.  See you there!

Leslie


The Idea Box


If you are having trouble thinking outside of the box, get inside the box.
IMG_1486.jpg


Well, hello there! You found me...inside my Idea Box.

I was having one of those days where my 'creativity' was mad at my 'imagination' and my 'imagination' was not talking to anybody.  Come on you two!  Let's work together here! I hate trying to keep the peace when these two fight; if only I had an Idea Box to go to - LIGHTBULB MOMENT!  

Thomas Edison had 1,093 U.S. patents and 2,332 patents.  He must have had a gigantic Idea Box!  He once said, 'I have not failed. I've just found 10,000 ways that won't work.' I didn't need 10,000 ideas, just one, so here is my Idea Box - my latest creation featuring DecoArt products.  I created this Design Team Inspiration piece for Mixed Media World's October Challenge 'Use or Imitate Glass'.  

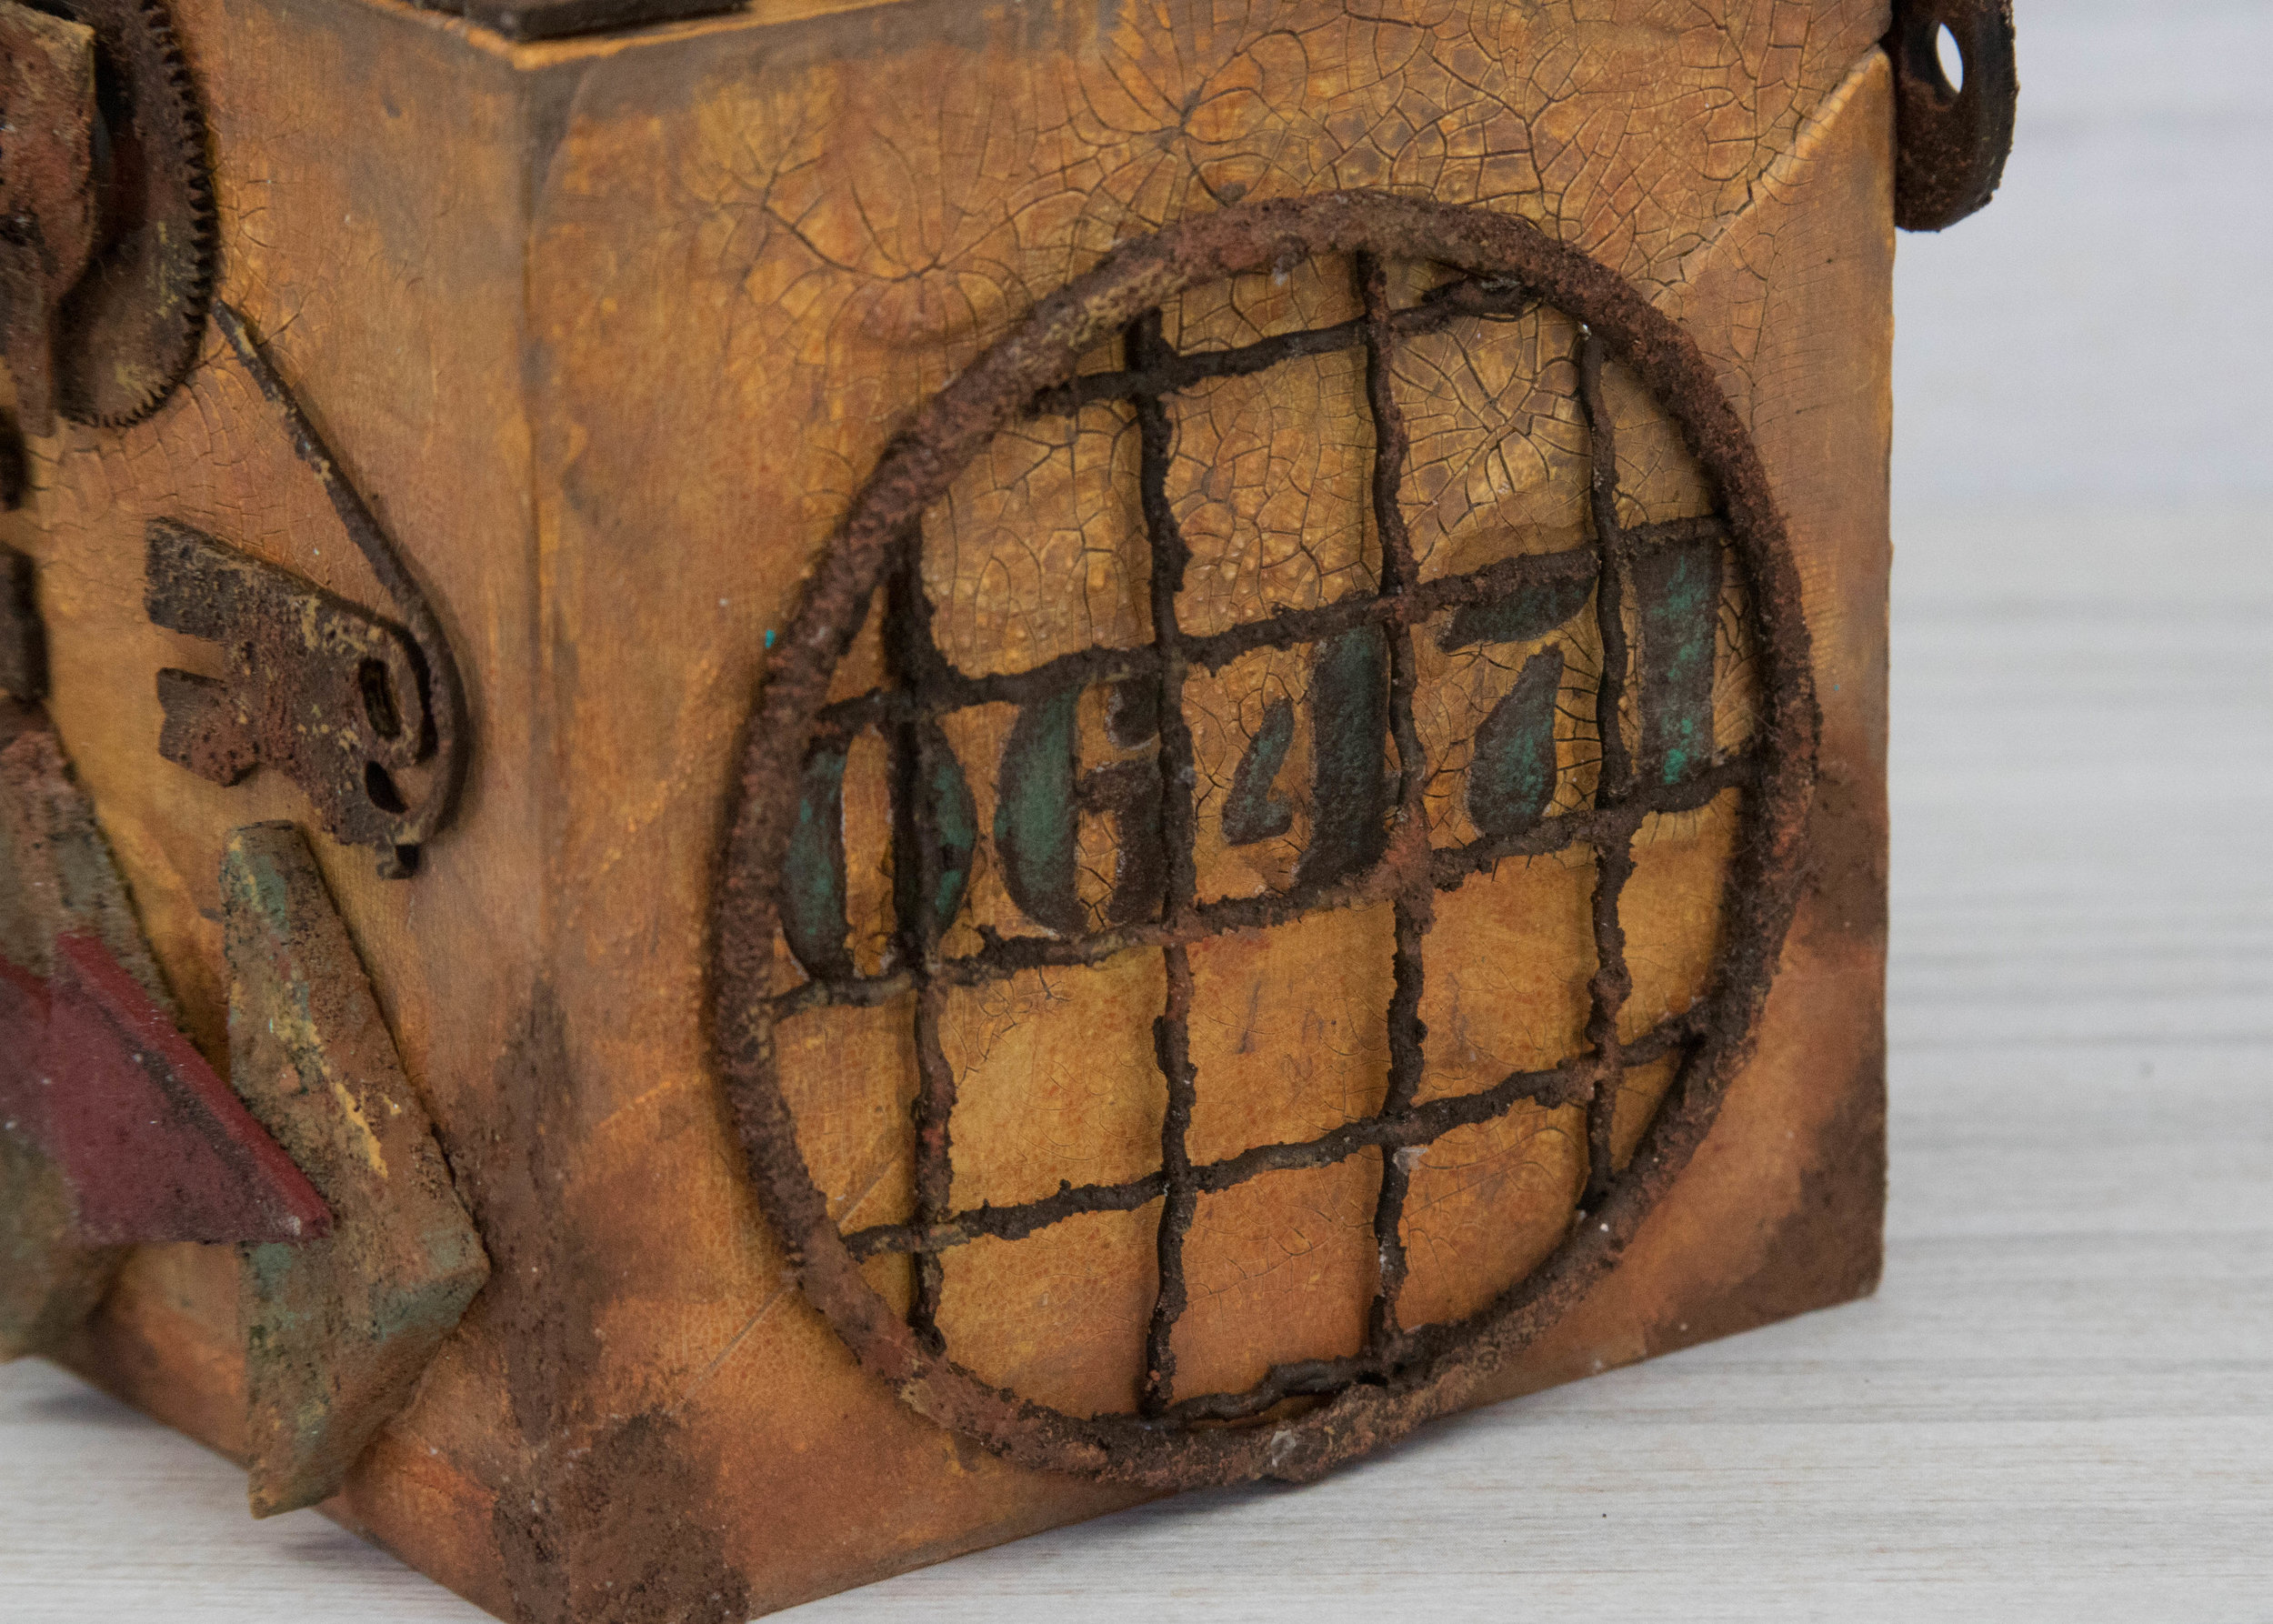
The base of my project began as a faux marble and wood block made from resin that I had purchased to alter.  I could hardly wait to cover up it's manufactured ugliness with some black gesso and brown acrylic paint!  Next I added a light coat of crackle paste and set the block aside to dry while I worked on the embellishments for the box. 

My embellishments were an assortment of purchased elements and my own makes.  The purchased clock face, mason jar lid, letters, mini padlock and key were treated with DecoArt Texture Sand Paste and 'rusted' with acrylic paint. From a sheet of chipboard, I cut, treated and painted the brackets, arrow and caution sign.  

Back to my box, I chipped away some of the crackle pieces before adding a stenciled number and paint.  I then attached my prepared embellishments to the top of the block and on the four sides to complete my Idea Box.  

IMG_1489.jpg
IMG_1512.jpg
IMG_1510.jpg
IMG_1504.jpg
IMG_1491.jpg


Product List

DecoArt Media Mediums:  Modeling Paste, Texture Sand Paste, White Crackle Paste and Ultra Matte Varnish

DecoArt Fluid Acrylics: 'Quinacridone Gold', 'Transparent Red Iron Oxide', 'Burnt Sienna', 'Blue Green Light', 'Pthalo Turquoise', 'Raw Sienna' and 'Yellow Oxide'

DecoArt Antiquing Creams:  'Patina Green' and 'Raw Umber'

DecoArt Media Stencils: Andy Skinner's 'Industrial Elements'

DecoArt Americana:  Acrylic Paints in 'Dark Chocolate', 'Bittersweet Chocolate', 'Burnt Sienna', 'Antique Gold', 'Burnt Orange', 'Tomato Red' and 'Aqua Sky'.

Kaiser Craft: Roman Clock Face Wood Flourish

Black gesso, 12 x 12 chipboard sheet, wire, miscellaneous found objects.


Heart Mender


IMG_1275.jpg

There's a machine for that, right?  

Art is my bandaid.  Heart Mender, my new canvas for Mixed Up Magazine featuring DecoArt products, is proof of that.  And, it is the first in a found object assemblage series I have planned called There's a Machine For That.

I haven't had a lot of time to create (or be present on social media lately).  The last thirty-something days have been a complete blur.  In the midst of planning a wedding, I had to plan a funeral.  But, as it is said, life goes on.

IMG_1311.jpg

When I was maybe six or seven, I began designing crayon-colored machines made of paper and lots of tape.  I remember so clearly coloring and cutting out the sort-of-circular coins to give to my parents and grandparents to insert in my paper 'vending' machines. When they put a coin in the slot, I would drop a 'prize' for them to pick up off the floor.  Soon, they gave me a puppy...  Looking back, my family probably thought I needed something to occupy my time.  A lot has changed since way back then, but this remains the same: I still love 'making machines'!

If you want to see a step by step tutorial for making a machine that mends holes in hearts, head over to the Mixed Up Mag Blog and read my post about the Heart Mender.  I have also included all the fabulous DecoArt Supplies that were used on this project!

Thanks for stopping by,

Leslie

IMG_1282.jpg

NiGHT-LiGHT: A Steampunk Inspired Assemblage


When I was a girl, I loved browsing the bookshelf at my Grandma's house.  She was an avid reader of Victorian Gothic Mysteries and I was fascinated by the book covers.  Not only were the titles enticing, but the cover art was a suspenseful mix of dark fog-shrouded cliffs and a beautiful woman (usually a young governess) running recklessly along the treacherous edge in a long, white nightgown.  Clearly some dastardly deed (or the 'brooding, but darkly handsome master of the house') caused this pretty damsel to dash out of the castle without a coat or a lantern!

So here I am, years later, creating a light source for those in need of escaping the manor, racing down hundreds of stone steps or plunging into the shadowy moors!  Please, take your NiGHT LiGHT with you!

Once again, I began my creation with a trip to the Thrift Shop, the Hardware Store and my own beautiful stash of cast-off treasures.  I love the inspiration I get from the Steampunk genre and tried to incorporate that style into this piece. I have created NiGHT LiGHT for the blog at Mixed Up.  I hope you have a moment to run over and check it out...but please stay away form the edge of the cliffs - venturing too close can be hazardous, especially if you trip on your long, flowing nightgown!

Wild Hearts


So, my husband came home after a long day at the office.  He couldn't believe his eyes.  I was in the kitchen and there was something in the oven!  Silly man, it's Art For Dinner!

But yes, I was in the kitchen cooking...cooking corks.  I do enjoy the occasional (wink) glass of Cabernet Sauvignon, Syrah, Malbec, big and bold Italian Red Blends...what were we talking about again?  Oh yes I remember, corks!  Yes, I guess you could say I have a modest collection of corks (I do not wish to discuss an actual number).  So why not use some in my Mixed Media?

As you know, I like to deconstruct stuff, so I decided to break down some corks to add to modeling paste for some serious texture.  What did I learn?  I learned I have taken corks for granted apparently, defining them as 'that annoying thing that comes between me and my wine'.  I respect them more now.  They are tough little devils who aren't interested in putting up with any if my s#*t, pardon my French.  Speaking of French, I also love a rich and lovely Cotes-du-Rhone Rouge.  Whoopsie, I digressed again...

So anyway, back to those wily corks.  I was going to use my mother's circa 1978 Ginsu knife (remember the ads, they cut through a can for goodness sake!); the knife did cut through the cork, but it was a laborious process.  When in doubt, Google it!  This led me to a pin on Pinterest that stated steaming the corks in a mesh basket over boiling water was the key.  The article continued to boast that the corks would cut like butter.  Okay...what the heck kind of 'butter' are these people cutting?  I paused...and then....a lightbulb moment!  Food Processor!  I unearthed this appliance from the pantry and loaded it up with the rubbery (not buttery) cork slices.  The first few blade rotations made me hopeful, but then the machine emitted a howl like a feral cat at the groomers!  Shut Down!  Shut Down!  Drats! I refused to be defeated.  Ok you dastardly corks, I didn't want to have to do this but you forced me:  into the oven you go!  I began at a low temp of 250 degrees.  Are you kidding me!  No change.  I had had IT!  450 degrees.  Some of them started to brown and the house smelled like a wood engraving shop...kind of nice actually...(with a fruit forward aroma from the wine on the corks.  My husband actually thought I was baking a pie).  After slightly cooling, I dumped my freshly baked cork pieces back into the Cork Processor (formerly known as the Food Processor).  Finally!  I achieved smaller pieces and decided to reward my efforts with a small glass of wine.  I selected a bottle from our wine cellar (kidding, just a wine rack) and prepared to remove the cork.  It broke and crumbled...of course it did...karma I guess. 

Ok, now that the Never-Ending-Story of The Cork is over I will proceed with Step 2: Preparing the Canvas.  I covered a 7 x 14 canvas with black gesso followed by modeling-paste-stenciling and random crackle paste.  I then mixed the cork pieces into additional modeling paste and applied this mixture around the canvas.  Another layer of black gesso was applied.

While my base was drying I cut 3 ATC-size pieces of chipboard. I applied texture in the form of foil, modeling paste and glue. I colored the background with Paper Artsy Infusions and the hearts with DecoArt Media. I highlighted the edges and texture with DecoArt Lustre. A Stabilo pencil provided the look of shadows around the hearts.

Back to my canvas, I painted tones of light green, yellow, copper and brown and  highlighted with white gesso and lustres. I attached three cork slices to the center of the canvas to lift my heart cards.  Excelsior was added under the middle card.  The finishing touch was the cork slice that had the year 2013 printed on it.  How perfect, as this is a bridal shower gift to my daughter, who began dating her wonderful husband-to-be in 2013! 

I hope you enjoyed this post.  Do try using cork pieces in your texture, its lightweight and provides inexpensive texture interest to your projects.  If you find an easy way to reduce the cork to bits, be sure and let me know!  


Product List

DecoArt Media:  Gesso, Modeling Paste, 1 Step Clear Crackle Glaze, Fluid Acrylics in 'Quinacridone Gold' and 'Red Iron Oxide', Antiquing Cream in 'Titanium White' and 'Raw Umber'

DecoArt Americana:  'Celery Green', 'Black' and 'Worn Penny' acrylic paint

Paper Artsy:  Infusions in 'Golden Sands'

Lindy's Stamp Gang:  Starburst Sprays in 'Clam Bake Beige' and "Ponderosa Pines Olive'

Prima Art Basics:  3D Gloss Gel

Inka Gold:  'Turquoise' and 'Yellow Gold'

Ranger:  Glossy Accents

TCW:  'Mini Tile Mania' stencil by Gabrielle Pollacco

7 x 14 canvas, corks, excelsior, chipboard, black gesso, foil